
In today’s fast-paced digital world, the ability to quickly scan and organize documents on the go is invaluable. Many iPhone users are unaware that their device offers a powerful, hidden Document Scanner feature within the Files app, designed to make document management both simple and efficient. This built-in tool allows you to capture and save documents as PDFs, providing an effective solution for personal and professional organization. Here’s a comprehensive guide to help you unlock and master this feature on your iPhone.
Step 1: Locate the Files App
The first step in using your iPhone’s Document Scanner is locating the Files app. This app, represented by a folder icon, is typically found on your home screen or in the App Library. It serves as the main hub for file storage and management on your device.
Once you open the Files app, you’ll find it offers a variety of organizational tools, including the hidden Document Scanner. In the top right corner, tap on the three dots to access additional options and select “Scan Documents” from the menu. This will activate the scanner.
Step 2: Open the Document Scanner
With the scanner active, your iPhone’s camera will open, allowing you to align the document you wish to scan within the frame. A yellow rectangular overlay will appear, automatically detecting the edges and guiding you to achieve a precise capture. This feature makes it easy to scan multiple pages in one go. After each capture, you can review and adjust the scanned image for clarity.
Step 3: Position Your Document
Proper positioning of your document is essential for obtaining a clear scan. For optimal results, follow these steps:
- Use a Flat Surface: Place your document on a flat, stable surface. This ensures a steady capture and helps the scanner accurately detect the edges.
- Ensure Good Lighting: Position your document in a well-lit area. Good lighting eliminates shadows and enhances scan quality.
- Align the Camera: Hold your iPhone directly above the document. This facilitates accurate edge detection and produces a sharper image.
To further enhance clarity, avoid any reflections or objects casting shadows on the document. The yellow overlay will confirm that the scanning area is properly aligned.
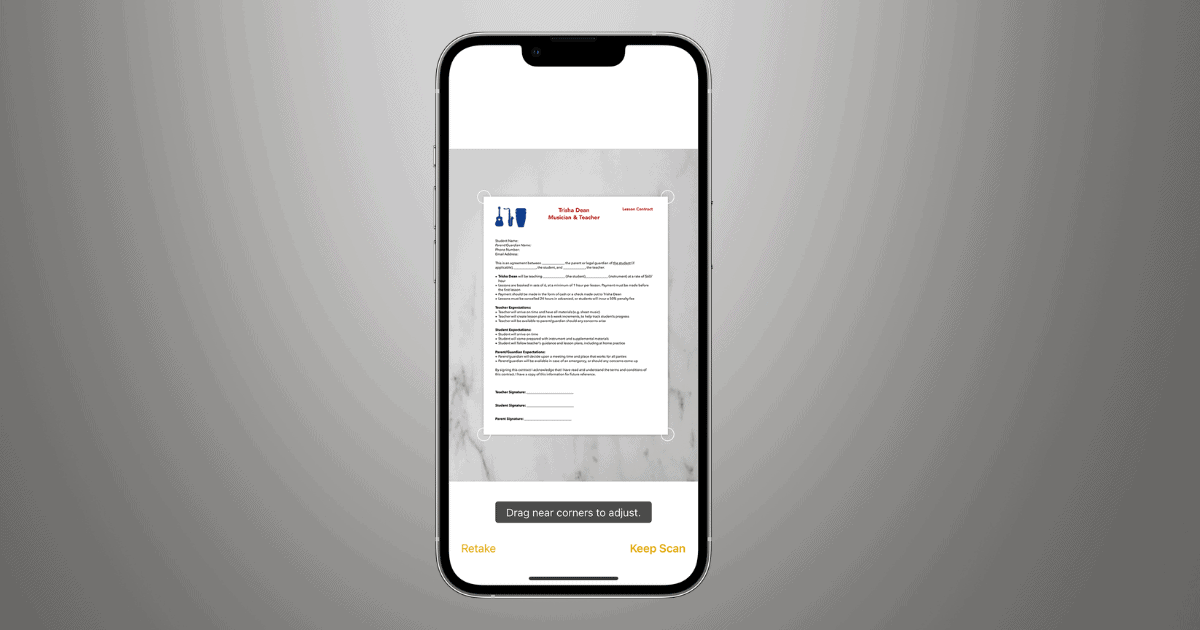
Step 4: Review and Adjust Your Scan
Once your document is scanned, it’s time to review the capture. Tap on the image to access a detailed view and check for clarity. If you’re not satisfied, you can retake the scan or adjust the edges by dragging the corners into alignment.
The Files app also offers several editing tools for enhancing the quality of your scanned document:
- Crop: Remove any unnecessary areas.
- Apply Filters: Adjust contrast and visibility for better readability.
- Rotate: Ensure the document is oriented correctly.
Thumbnail previews of all pages appear at the bottom-left, making it easy to navigate between scans. After finalizing your adjustments, tap “Save” to securely store the document.
Step 5: Save as PDF
The iPhone scanner automatically saves your document as a PDF, which is ideal for both personal and professional use. The PDF format maintains the document’s layout and ensures compatibility across various devices and platforms.
To save the scan, simply tap “Save” after reviewing it. You can rename the PDF within the Files app for easier organization and access. This functionality makes it convenient to share documents via email, messaging apps, or cloud storage directly from your iPhone.
Step 6: Organize Your Scans
Organizing your scanned documents effectively is crucial for maintaining a tidy digital workspace. The Files app offers robust organizational features:
- Create Folders: Group related scans by project, type, or date for easy retrieval.
- Rename Files: Use clear and descriptive names to identify each document quickly.
- Search Functionality: Locate documents using keywords or file names for quick access.
By regularly organizing your scans, you can keep your digital space clutter-free, making it easier to find and manage important documents when you need them.
Step 7: Troubleshooting Tips
If you encounter issues with the scanner, these troubleshooting tips can help:
- Update iOS: Ensure your iPhone is running the latest software, as updates often improve scanner functionality.
- Optimize Lighting: Scanning in a well-lit area helps improve the quality of your capture.
- Verify Storage Location: Ensure the document is saved in iCloud or “On My iPhone,” as other storage options might disrupt scanning.
- Restart Your Device: A quick restart can resolve minor glitches affecting scanner performance.
Final Thoughts
The iPhone’s hidden Document Scanner is a powerful tool for efficient document management, offering quick and reliable ways to digitize and organize paperwork. Whether you’re a student archiving study notes or a professional managing contracts, mastering this feature can significantly enhance productivity and streamline your workflow.